MCP Servers#
Open Config → MCP Servers to register and manage Model Context Protocol (MCP) integrations that provide external tools for Chat and agent workflows.
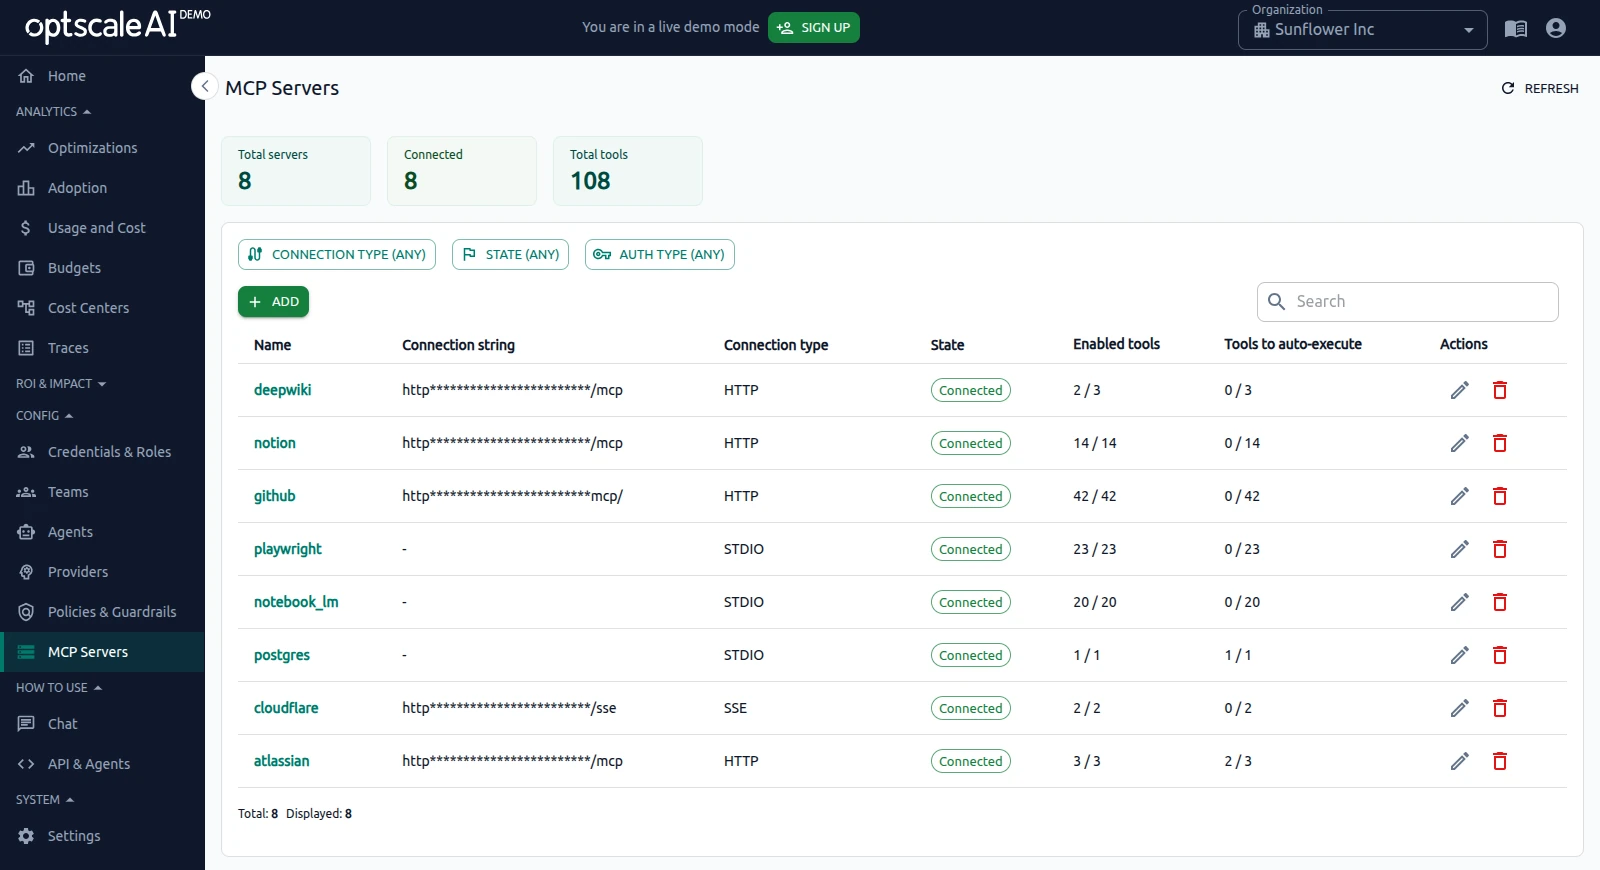
The MCP Servers list shows each integration's connection status, discovered and enabled tools, and available management actions.
Overview#
What are MCP tools?#
MCP tools are actions that an assistant or agent can use to interact with external systems, such as searching a repository, retrieving documents, creating tickets, querying calendars, or calling internal services.
An MCP server provides these tools. After the server is registered, OptScale AI discovers the tools exposed by the server, and administrators control which tools are enabled and who can access them.
When to use an MCP server#
Add an MCP server when Chat or agent workflows need access to external tools or data sources, for example to:
- Search internal documentation or repositories.
- Retrieve data from external systems.
- Create or update records in connected applications.
- Call internal services or APIs.
MCP integration is optional when workflows do not require external tools or data sources.
How MCP servers work#
An MCP server registration defines how OptScale AI connects to an external tool provider, including the transport and authentication settings.
After the connection succeeds, OptScale AI discovers the tools exposed by the server. Administrators then enable the required tools and configure access for users or workflows.
Registering a server does not make discovered tools available automatically. Required tools must be enabled before they can be used.
For platform context, see Architecture Overview — MCP in the platform.
Configure an MCP server#
Before you begin#
Before adding an MCP server, confirm that:
- An organization is selected.
- The MCP server connection details and required credentials are available.
- OptScale AI can reach the MCP endpoint through the required network path.
- Identify the users or workflows that require access to the integration.
Add an MCP server#
- Open Config → MCP Servers.
- Click + ADD.
-
Choose a setup method.
Preset
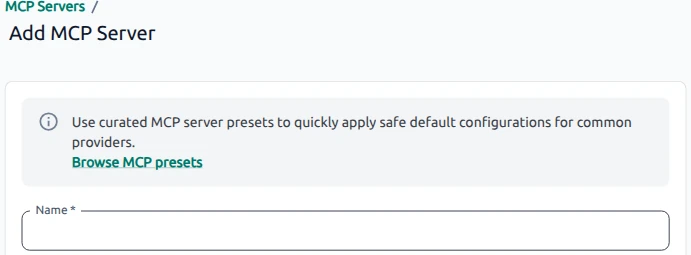
Use Browse MCP presets when a predefined configuration is available:
- Select a preset.
- Review the pre-filled settings.
- Add any required credentials.
-
Save the configuration.
Review presets before save
Preset configurations may require customization. Confirm MCP server URL, authentication, and headers match your environment.
Manual
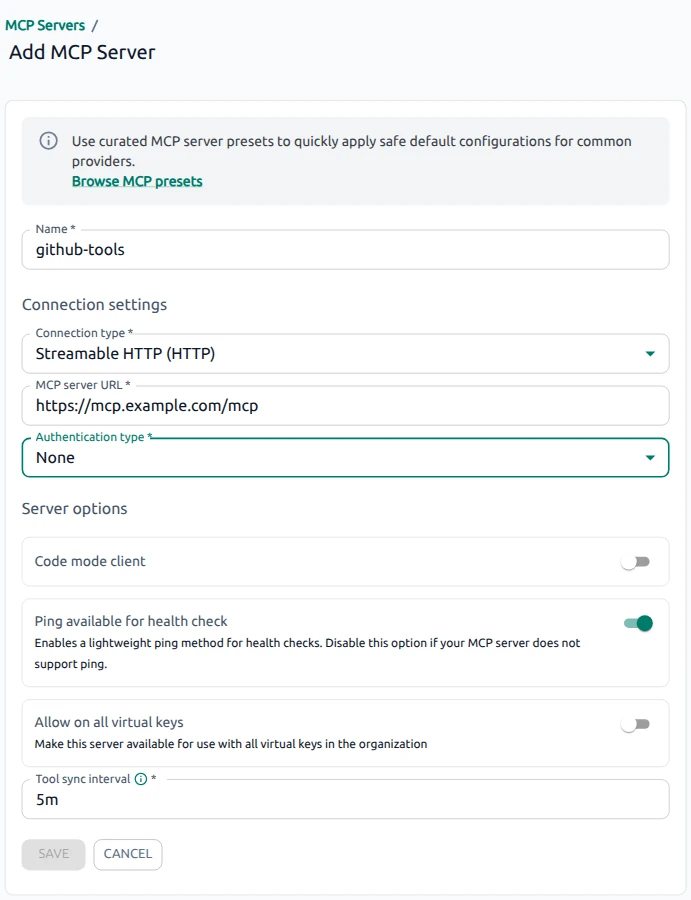
Configure the required fields:
- Name — Unique name for the server.
- Connection type — Transport used by the MCP server: HTTP, SSE, or STDIO.
- MCP server URL — Endpoint for HTTP or SSE connections.
- Authentication type — Authentication method required by the server: None, Headers, or OAuth 2.0.
Configure any additional server options shown for the selected connection type:
- Code mode client — Enable for code-oriented MCP client workflows.
- Ping available for health check — Enable when the server supports ping; disable for servers that reject ping requests.
- Tool sync interval — How often the platform refreshes the tool list from the MCP server.
-
Click SAVE.
- Wait until the server appears in the table. Click REFRESH if it is not listed yet, and confirm that the State column shows Connected.
If status fails, see Troubleshooting and use RECONNECT from the details page after correcting the configuration.
Example: HTTP MCP server#
Use this pattern for a remote MCP server reachable over HTTP.
| Field | Example value |
|---|---|
| Name | github-tools |
| Connection type | Streamable HTTP (HTTP) |
| MCP server URL | https://mcp.example.com/mcp |
| Authentication type | None |
| Code mode client | Off unless you need code-oriented MCP workflows |
| Ping available for health check | On if the server supports ping; off otherwise |
| Tool sync interval | Default or per your operational needs |
After save, open Tools, enable the required tools, and confirm that the intended users or workflows have access to the server.
Configure tools#
Open the MCP server and select the Tools tab to review tools discovered from the server.
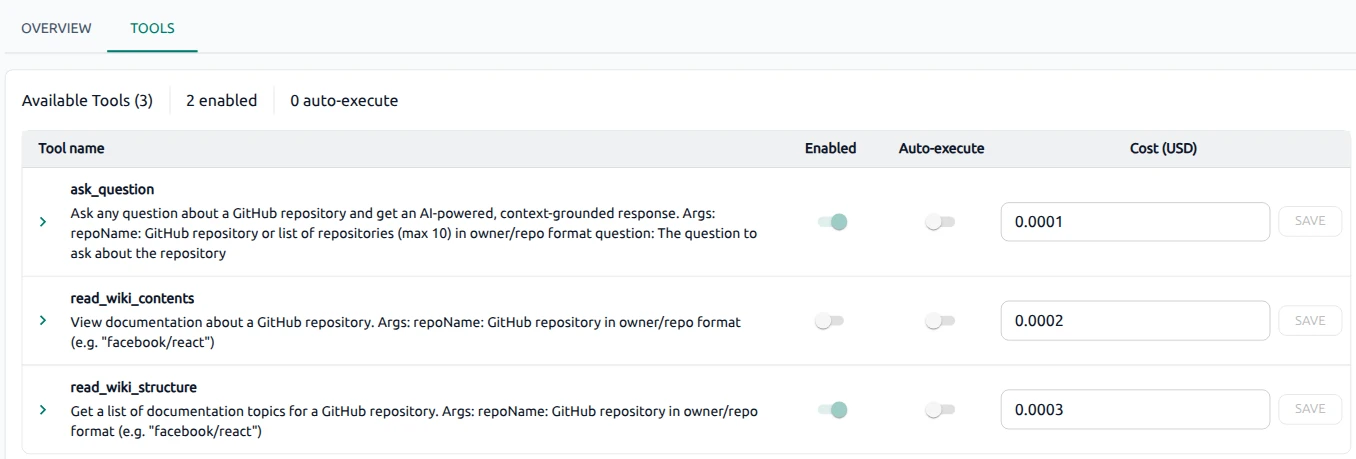
The summary line shows how many tools are discovered, enabled, and configured for automatic execution.
For each tool:
- Enabled — Controls whether the tool is available to supported workflows.
- Auto-execute — Controls whether the tool may run automatically.
- Cost (USD) — Optional per-use cost for usage tracking.
Expand a tool row to review the identifier, description, and Args summary returned by the server.
Click SAVE after changing a tool configuration.
Verify MCP server#
- Confirm that the server status is Connected.
- Open the Tools tab and confirm that the required tools are enabled.
- Confirm that the intended users or workflows have access to the server.
- Test the integration from Chat or an agent workflow and confirm that the required tool is available.
If tools do not appear, wait one Tool sync interval cycle or use RECONNECT, then recheck the Tools tab.
Troubleshooting#
Server does not reach Connected status
- Verify MCP server URL, Connection type, and Authentication type.
- Confirm that OptScale AI can reach the endpoint.
- Try disabling Ping available for health check if the server does not support ping.
- Click RECONNECT on the details page after correcting the configuration.
Connected but no tools listed
- Open Tools and allow time for synchronization based on the configured Tool sync interval.
- Confirm that the MCP server exposes tools for the configured credentials.
- Use RECONNECT to re-establish the connection and refresh tool discovery.
Tools enabled but unavailable in Chat
- Confirm that the required tools are Enabled and that the changes were saved.
- Confirm that the intended users or workflows have access to the server.
- Confirm that the user selected the correct organization and has allowed providers for the Chat session.
Auto-execute or cost settings ignored
- Save each tool row after editing Auto-execute or Cost (USD).
- Confirm that the summary line on the Tools tab reflects the enabled and auto-execute counts.
Manage MCP servers#
MCP server details#
Open an MCP server to review its configuration, connection status, and discovered tools.
The detail page includes:
- Overview — Connection and operational settings.
- Tools — Discovered tools and their availability settings.
The available controls let you update the server configuration or reconnect the integration.
Edit an MCP server#
- Open the server from the MCP Servers list or its details page.
- Click EDIT.
- Update the operational settings shown on the form.
- Click SAVE.
Connection fields such as Name, Connection type, MCP server URL, and authentication are not editable after the server is created.
Click CANCEL to discard edits, or DELETE to remove the server. See Delete an MCP server.
Delete an MCP server#
- Open the server from the MCP Servers list or details page.
- Click EDIT, then DELETE.
- Confirm when prompted.
The server and its discovered tools are removed from the organization and are no longer available in Chat or agent workflows.