Guardrails#
Open Config → Policies & Guardrails → Guardrails to create and manage reusable guardrails, such as PII, secrets, toxicity, and other content checks. Guardrails define what to inspect. To apply a guardrail to Chat or API traffic, link it to an enabled policy.
The Guardrails tab lists existing guardrails and their type, stage, usage statistics, creation date, and available actions.
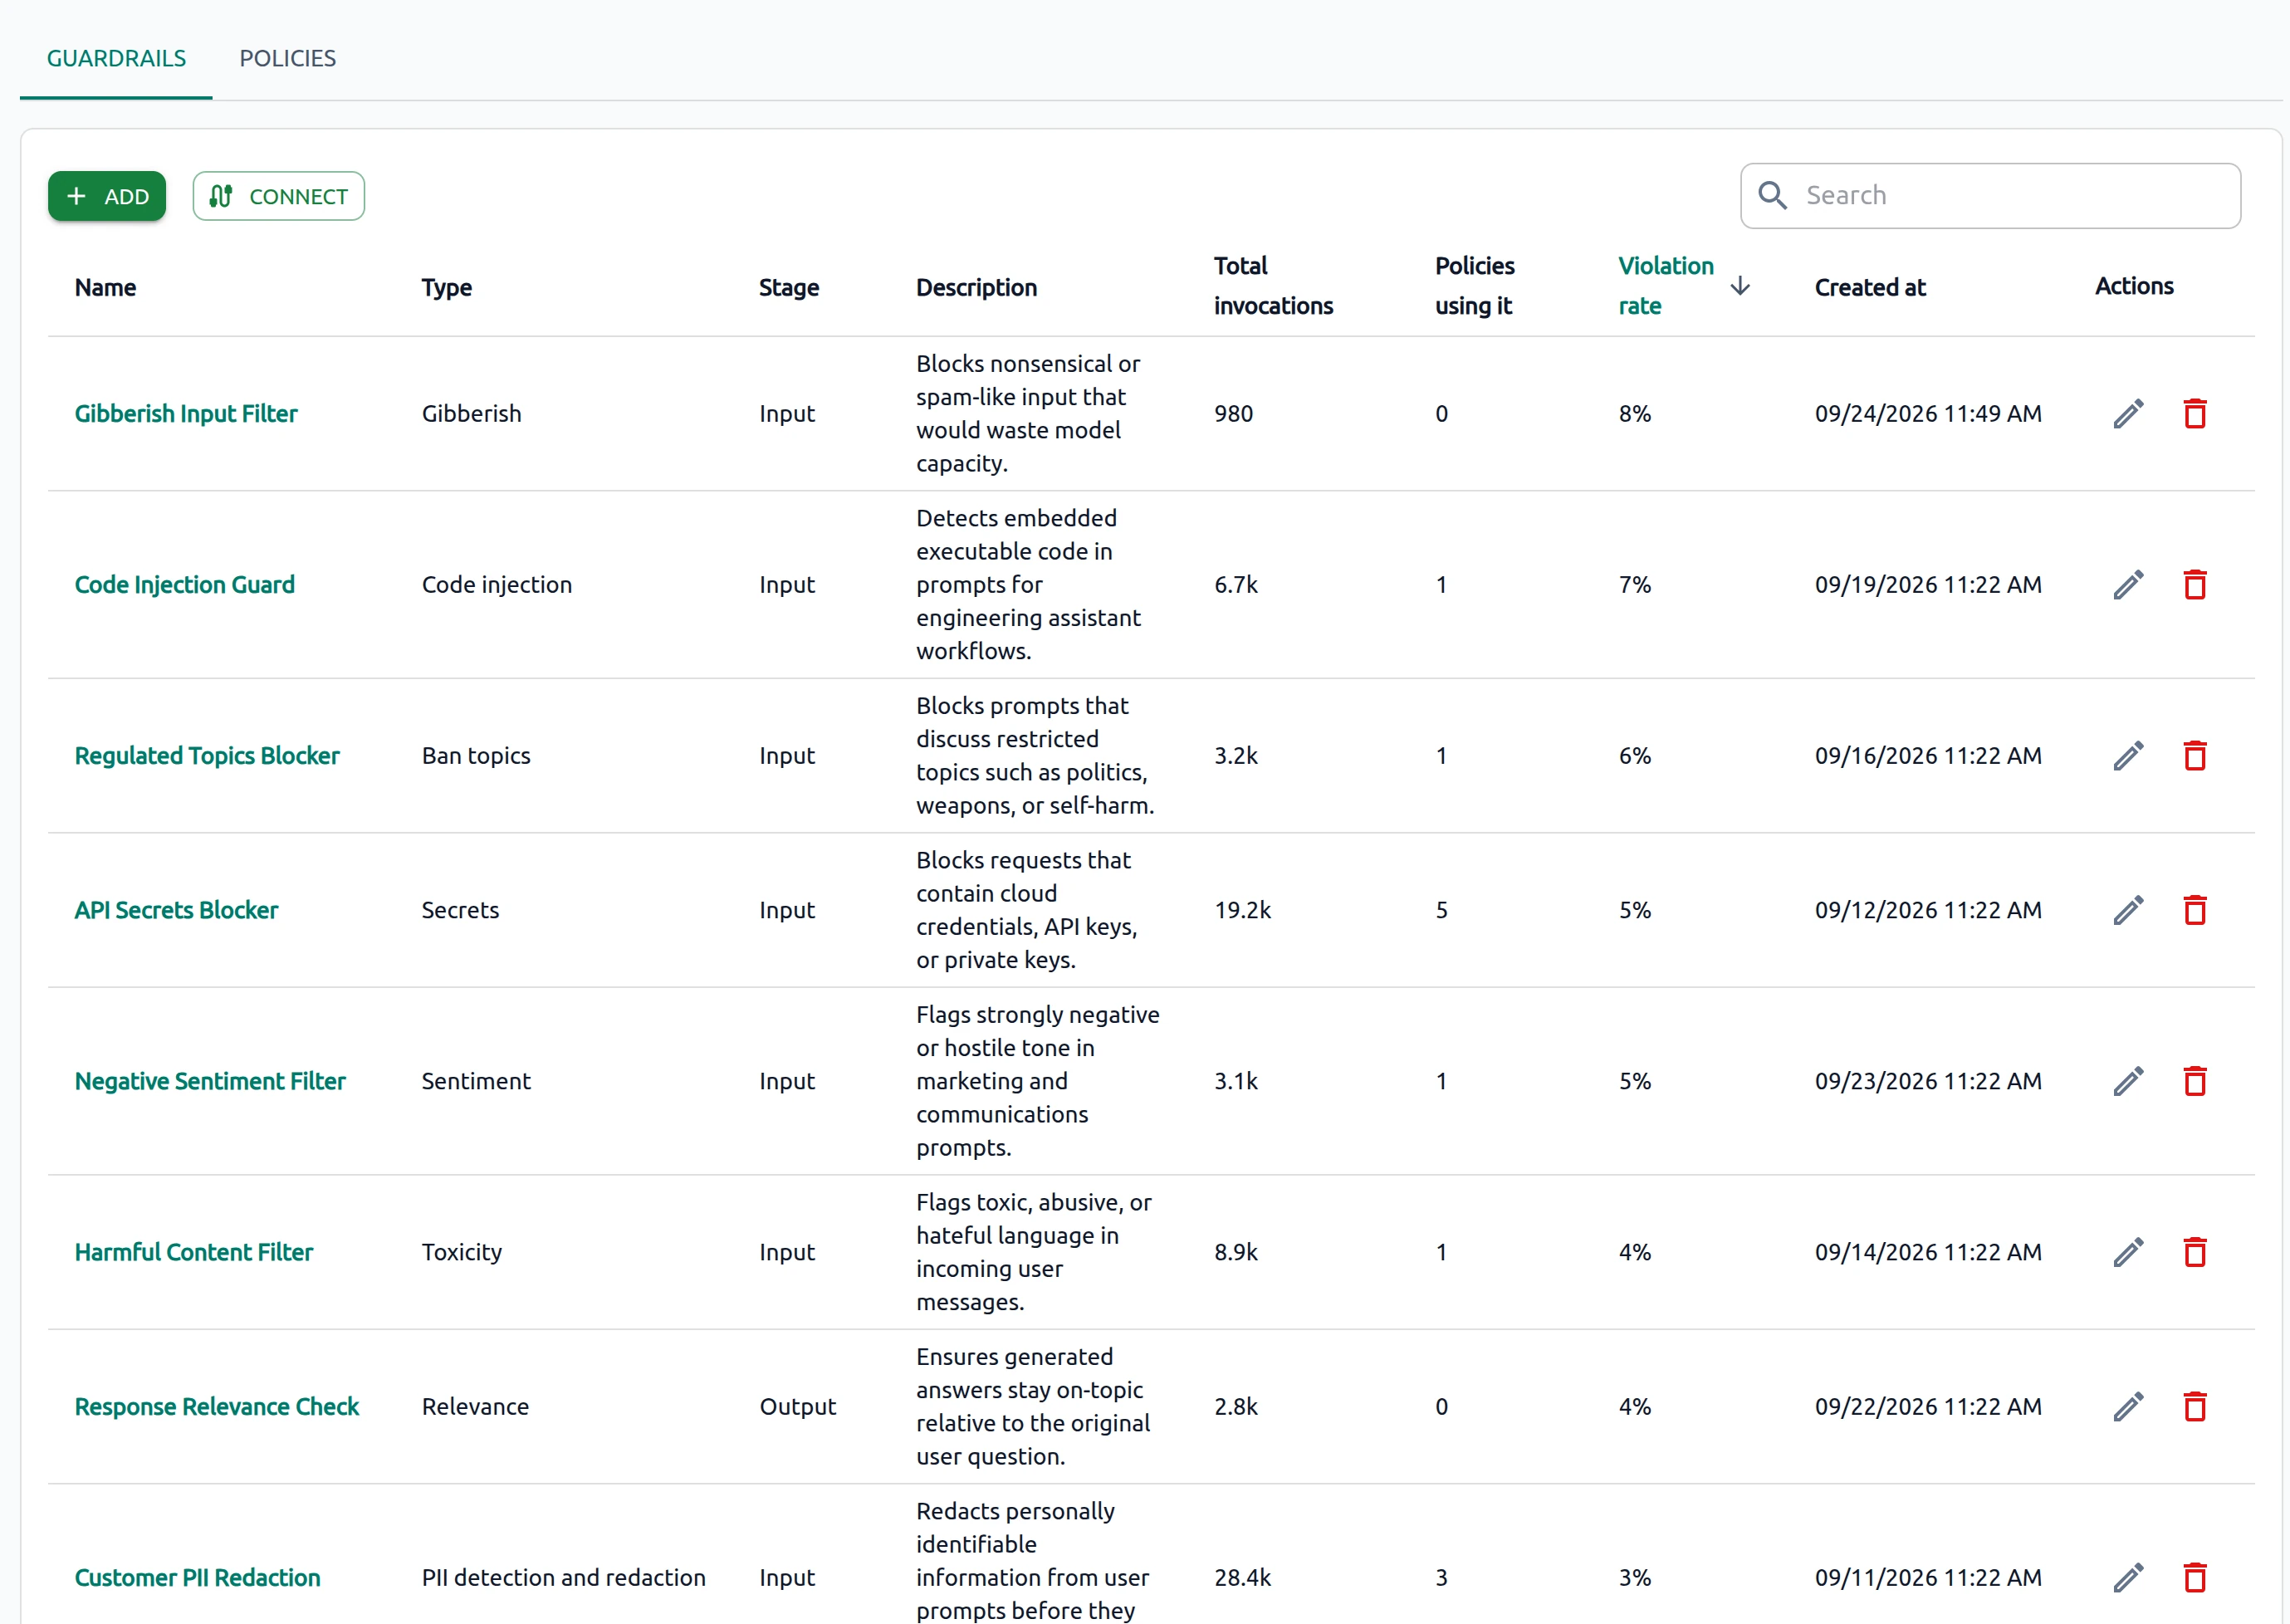
Overview#
Guardrail types#
When you add a guardrail, select the Type that matches the content or risk you want to evaluate at the configured Stage.
| Type | Purpose |
|---|---|
| PII detection and redaction | Detects personally identifiable information and applies the configured action. |
| Secrets | Detects credentials, API keys, tokens, passwords, and other secrets. |
| Ban topics | Detects content related to configured prohibited topics. |
| Jailbreak | Detects attempts to bypass model safety instructions, role constraints, or usage boundaries. |
| Prompt injection | Detects instructions that attempt to override system or developer prompts. |
| Toxicity | Detects harmful, abusive, hateful, or otherwise offensive language. |
| Invisible text | Detects hidden or non-visible characters and Unicode obfuscation. |
| Token limit | Enforces a configured limit on tokens in the evaluated request or response. |
| Code injection | Detects executable or malicious code patterns in text. |
| Gibberish | Detects nonsensical or low-quality text. |
| Sentiment | Evaluates emotional tone in content against a configured threshold. |
Type-specific fields (for example PII fields, topic lists, or token limits) appear in the guardrail form after you select a Type. Link the guardrail to a policy to put it into effect—see Add a policy.
Guardrail thresholds#
For guardrail types that use a threshold, the threshold determines when a detected match triggers the configured action.
The supported range and interpretation depend on the guardrail type. Review the fields shown after selecting the Type and test the configuration before enabling enforcement in production.
Configure a guardrail#
Before you begin#
Complete these checks before you create a guardrail:
- An organization is selected in the header.
- Providers are Active and the required models are enabled if you plan to test the guardrail after linking it to a policy.
- Select the appropriate Type and Stage for the content you want to inspect. See Guardrail types.
- Review the required fields for the selected Type, including Threshold and Action when applicable. See Guardrail thresholds.
Add a guardrail#
-
Open Config → Policies & Guardrails and select the Guardrails tab.
-
Click + ADD to open the guardrail form.
-
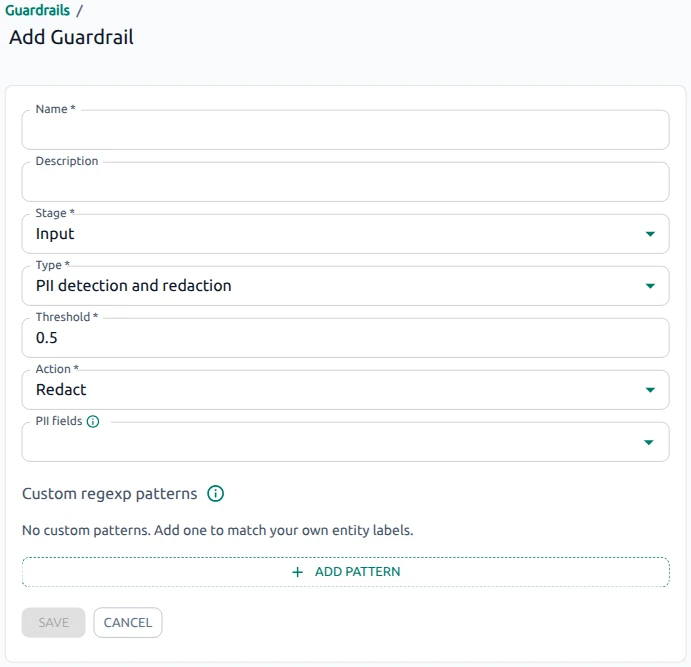
Complete the fields that are always shown on the form:
- Name — A unique name for this guardrail (for example,
pii-redact-input). - Description — Optional notes for administrators.
- Stage — Select when the guardrail runs: Input or Output. For typical input or output checks, align the guardrail Stage with the linked policy Stage. See Add a policy.
- Type — Select the guardrail engine that matches the content you want to inspect. See Guardrail types.
After you select a Type, complete any type-specific fields that appear.
Type-specific fields can include:
- PII fields / Secret types — Limit detection to selected categories. Leave empty to use the default behavior for the selected guardrail type.
- Custom regexp patterns — Optional custom PII patterns. If you add a pattern with + ADD PATTERN, provide the entity label, score, and at least one regexp. Context keywords are optional.
- Threshold — Defines when a detected match triggers the configured action for types that use threshold-based evaluation. See Guardrail thresholds.
- Action — Defines what happens when the guardrail detects a match.
- Topics — Prohibited topics for ban-topic guardrails.
- Token limit and Encoding — For token-limit guardrails.
- Languages — For code guardrails.
- Match type — For gibberish guardrails.
- Name — A unique name for this guardrail (for example,
-
Click SAVE to create the guardrail.
Optional actions:
- Click CANCEL to return without saving.
For complete examples, see PII redaction and Block secrets.
When a guardrail runs#
A saved guardrail does not affect traffic by itself. It runs only when:
- It is linked to an Enabled policy.
- The request matches the policy conditions and evaluation scope.
- The request is selected according to the policy Sampling rate.
- The guardrail Stage matches the current request stage.
Until the guardrail is linked to a policy, Policies using it remains 0 on the detail page.
See Policy vs guardrail for how policies and guardrails work together.
Verify guardrail#
Verify that the guardrail runs as expected through a linked policy:
- Open the guardrail detail page and confirm the Type, Stage, and linked policies.
- Send Chat or API traffic that matches the linked policy.
- Confirm that Total invocations increases and review Violation rate when applicable.
- Open the linked policy and review Usage Statistics.
If the policy Sampling rate is below 100%, more requests may be required before the guardrail is invoked.
Troubleshooting#
Guardrail saved but never runs
- Confirm it is linked from an Enabled policy.
- Confirm policy Conditions and Request type match your traffic.
- Set policy Sampling rate to
100%during testing.
Policies using it remains 0
- Add or edit a policy, fill in or update the required fields, and select this guardrail under Linked Guardrails.
- Save the policy after selecting the guardrail.
Invocations stay at 0
- Send matching traffic after the policy is enabled.
- See Observability and Verify guardrail.
Too many or too few detections
- Adjust Threshold; see Guardrail thresholds.
- Narrow policy Conditions so the guardrail runs only on intended traffic.
For policy-side issues (sampling, timeout, bypass), see Policies troubleshooting.
Manage guardrails#
Guardrail details#
The guardrail detail page contains:
- Summary cards — Number of linked policies, total invocations, and violation rate. Violation rate is displayed as - until evaluation data becomes available.
- Description — Summary of the guardrail purpose and intended behavior.
- Overview — Name, type, execution stage, and creation date.
- Configuration — Type-specific settings such as threshold, action, selected PII fields, and custom patterns. Fields that are not configured display None.
Use EDIT to modify the guardrail and Policies using it to review linked policies.
Edit a guardrail#
-
Open the guardrail for editing using one of the following options:
- On the Guardrails tab, in the Actions column of the guardrail row, click the
 Edit icon.
 - On the guardrail detail page, click EDIT.
- On the Guardrails tab, in the Actions column of the guardrail row, click the
-
Review the pre-populated configuration and update fields described in Add a guardrail.
-
Click SAVE to apply changes.
Changes affect every policy that links to the guardrail. Review Policies using it before changing Stage or Type.
Optional actions:
- Click CANCEL to return without saving changes.
- Use DELETE to remove the guardrail. See Delete a guardrail.
Delete a guardrail#
-
Open Config → Policies & Guardrails and select the Guardrails tab.
-
Remove the guardrail using one of the following options:
-
On the Guardrails tab, in the Actions column of the guardrail row, click the
 Delete icon, or
 -
Click the guardrail name to open the detail page, click EDIT, then click DELETE on the edit form.
-
-
Confirm the deletion when prompted.
A guardrail linked to an active policy cannot be deleted. Remove it from Linked Guardrails in the affected policies first.