Connect Claude#
Connect Claude Code or Claude Desktop to OptScale AI so Claude workflows use models available through your OptScale AI organization.
The integration is supported on Windows, Linux, and macOS.
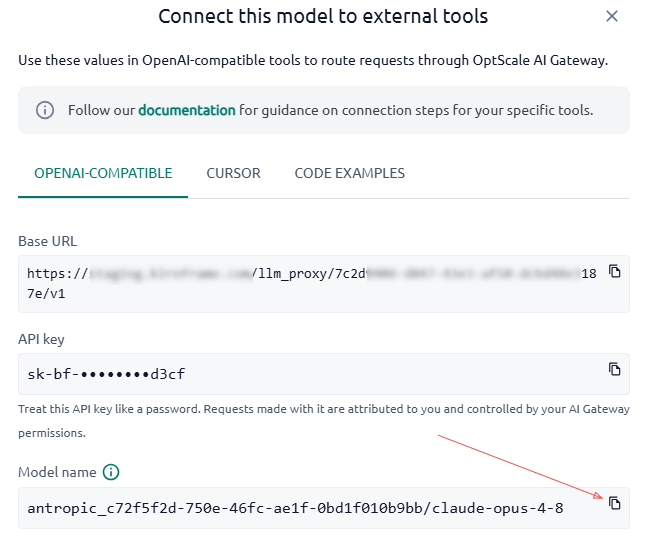
Before configuring Claude, open Connect this model to external tools → OPENAI-COMPATIBLE in Chat and retrieve the required connection values. For Claude integrations, replace the /v1 suffix in the copied Base URL with /anthropic.
For details, see Get connection values from Chat.
For shared requirements and limitations, see External Tools.
Prerequisites#
Before configuring Claude, confirm that:
- An organization exists and at least one Active provider is configured.
- The user has access to the required providers.
- The OptScale AI deployment is accessible over HTTPS with a valid TLS certificate.
- For workflows that use tools, the selected model supports tool execution.
Connect Claude Code#
1. Open or create the Claude Code user settings file:
- For Windows:
%USERPROFILE%\.claude\settings.json - For macOS and Linux:
~/.claude/settings.json
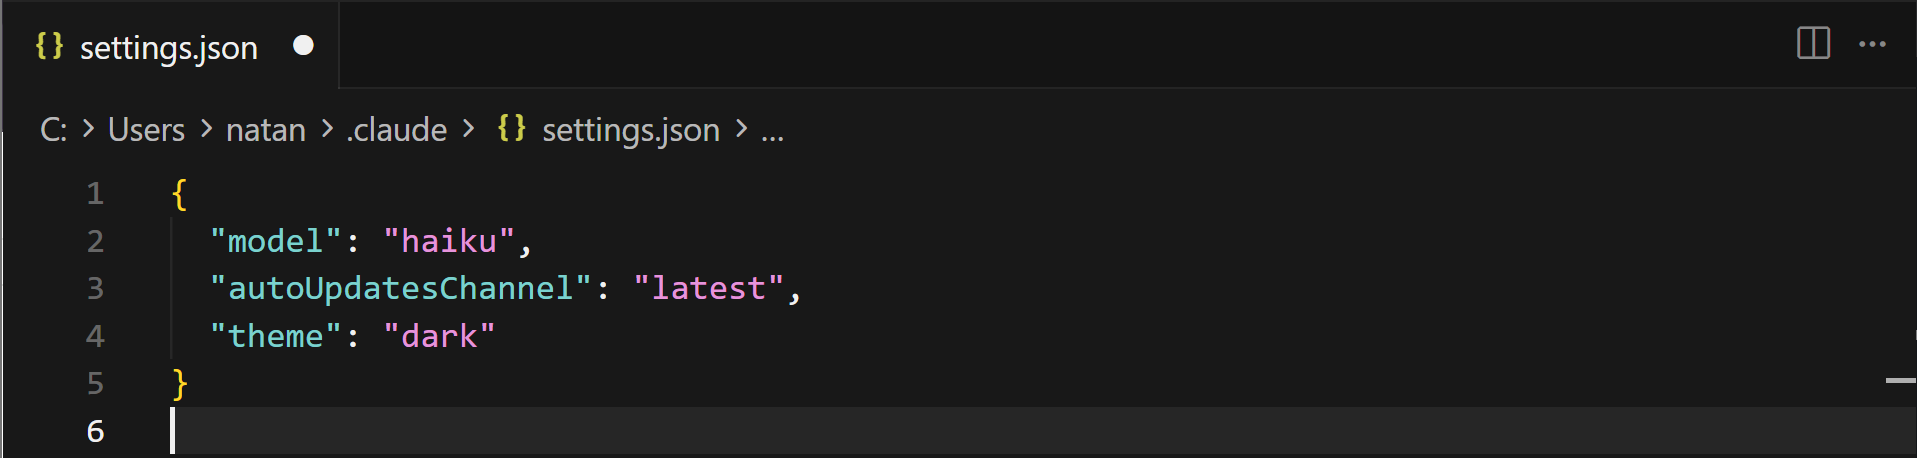
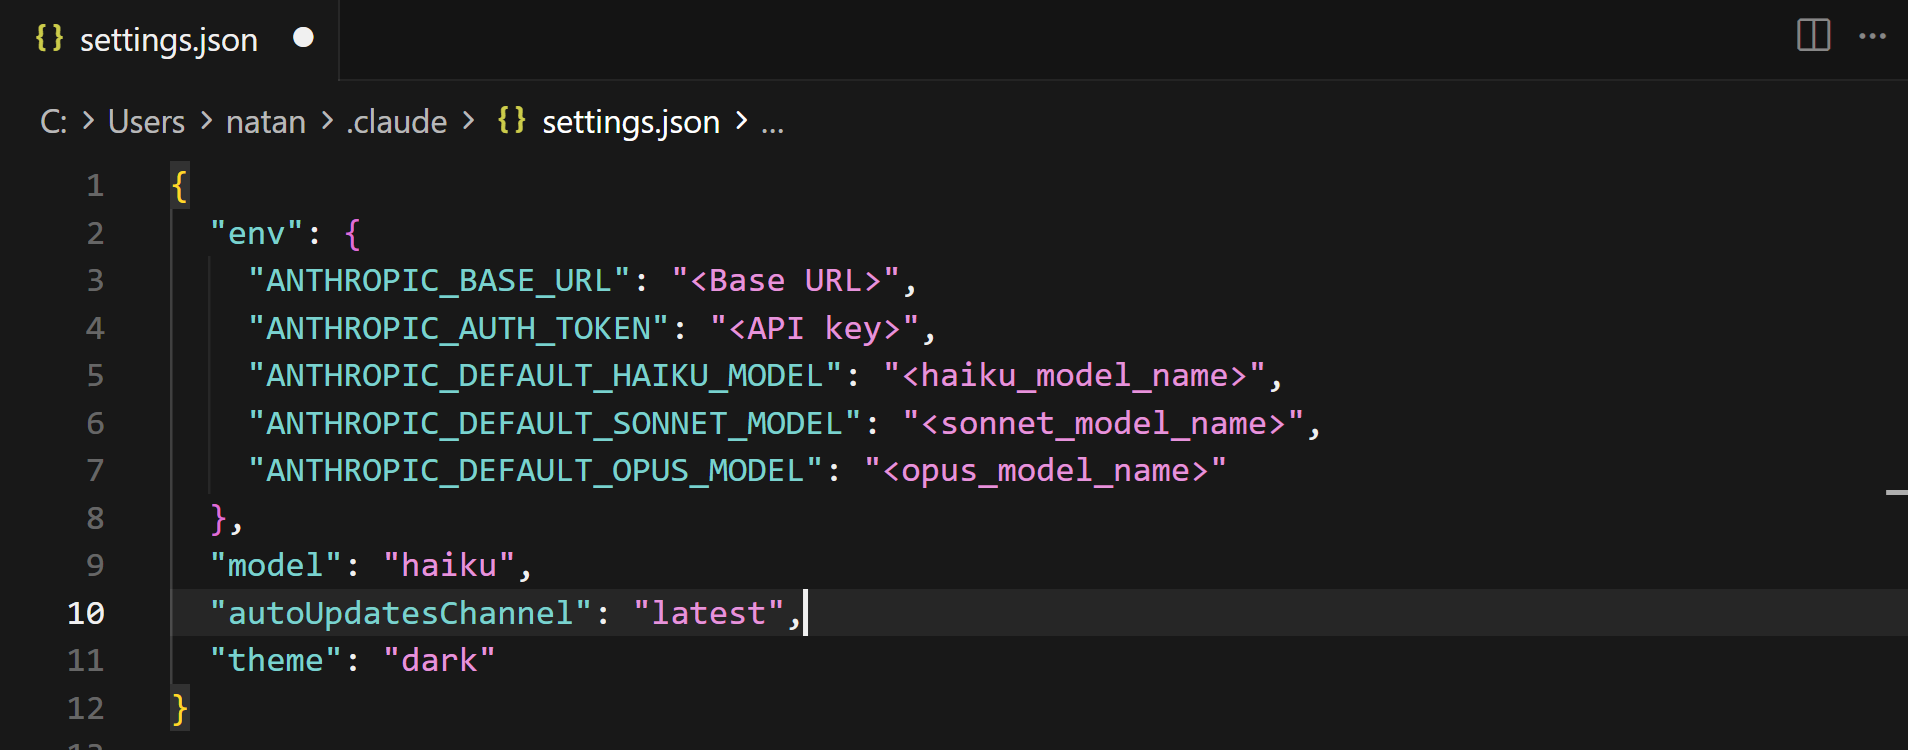
2. Add or update the env block:
{
  "env": {
    "ANTHROPIC_BASE_URL": "<Base URL>",
    "ANTHROPIC_AUTH_TOKEN": "<API key>",
    "ANTHROPIC_DEFAULT_HAIKU_MODEL": "<haiku_model_name>",
    "ANTHROPIC_DEFAULT_SONNET_MODEL": "<sonnet_model_name>",
    "ANTHROPIC_DEFAULT_OPUS_MODEL": "<opus_model_name>"
  }
}
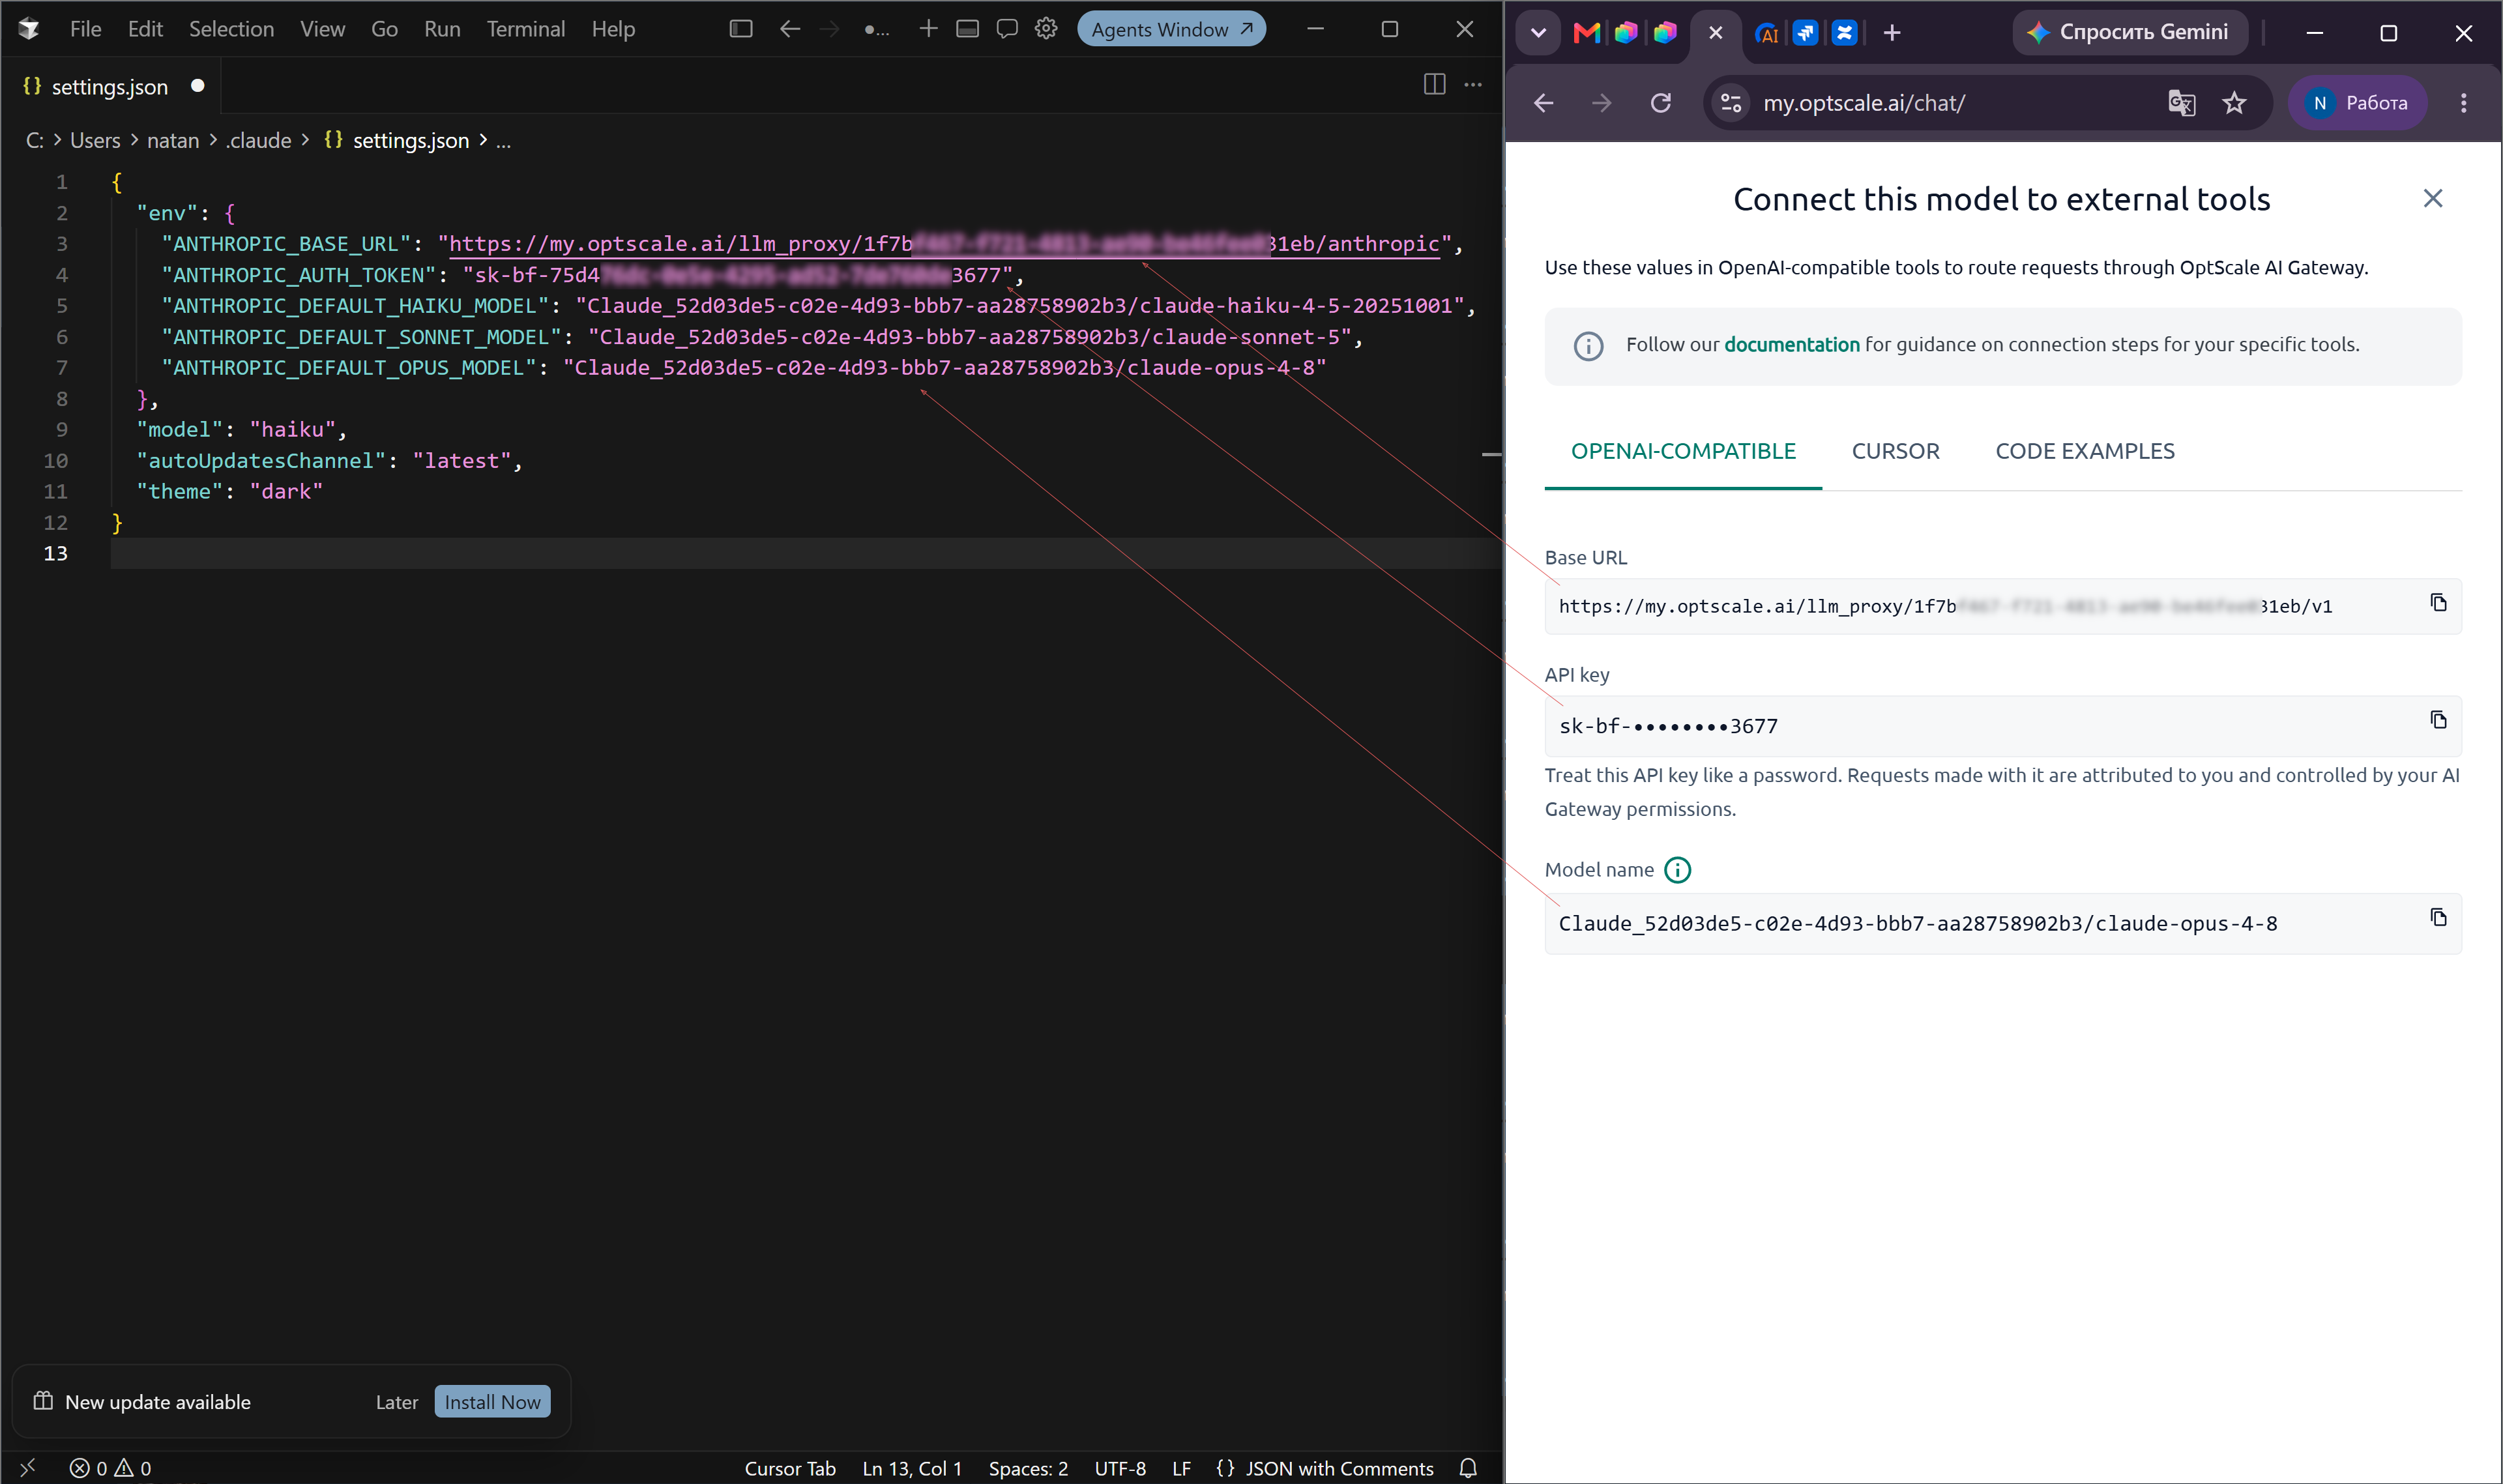
3. Configure the values:
-
ANTHROPIC_BASE_URL
- Copy Base URL from Connect this model to external tools → OPENAI-COMPATIBLE.
- Replace the
/v1suffix with/anthropic. - Paste the resulting value into
ANTHROPIC_BASE_URL.
Example:
https://my.optscale.ai/llm_proxy/.../v1↓
https://my.optscale.ai/llm_proxy/.../anthropic -
ANTHROPIC_AUTH_TOKEN
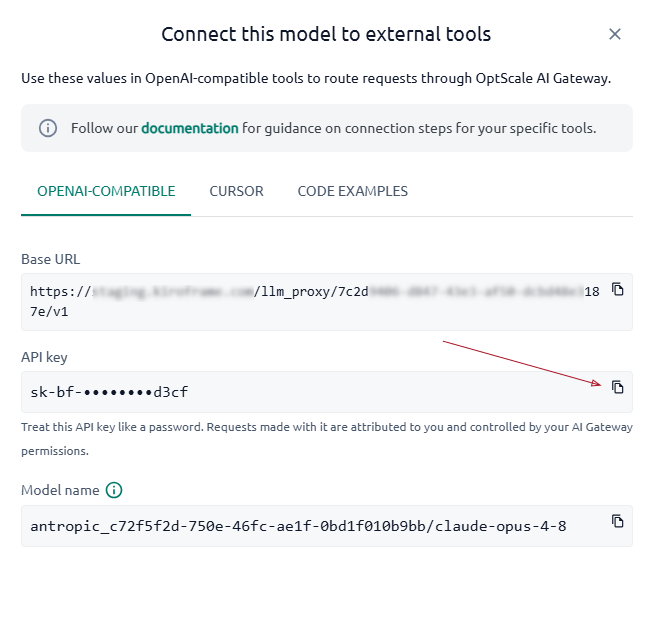
- Copy API key from the same Chat dialog.
- Paste the value into
ANTHROPIC_AUTH_TOKEN.
-
ANTHROPIC_DEFAULT_HAIKU_MODEL, ANTHROPIC_DEFAULT_SONNET_MODEL, and ANTHROPIC_DEFAULT_OPUS_MODEL
- Copy Model name from OptScale AI Chat.
- Paste the value into the variable that matches the Claude Code tier.
At least one of the model variables must be configured. If multiple variables are configured, Claude Code uses the corresponding model for each tier.
The following example configures only the Haiku tier:
{
  "env": {
    "ANTHROPIC_BASE_URL": "https://my.optscale.ai/llm_proxy/.../anthropic",
    "ANTHROPIC_AUTH_TOKEN": "sk-bf-...",
    "ANTHROPIC_DEFAULT_HAIKU_MODEL": "<haiku_model_name>"
  }
}
4. Save the file.
5. Run claude /logout, restart Claude Code, and then run /models. Confirm that the configured models appear in the list.
6. Send the test prompt described in Verify the connection.
Connect Claude Desktop#
1. Open Claude Desktop and enable Developer Mode: Help → Troubleshooting → Enable Developer Mode.
2. Open the third-party inference settings: Developer → Configure Third-Party Inference.
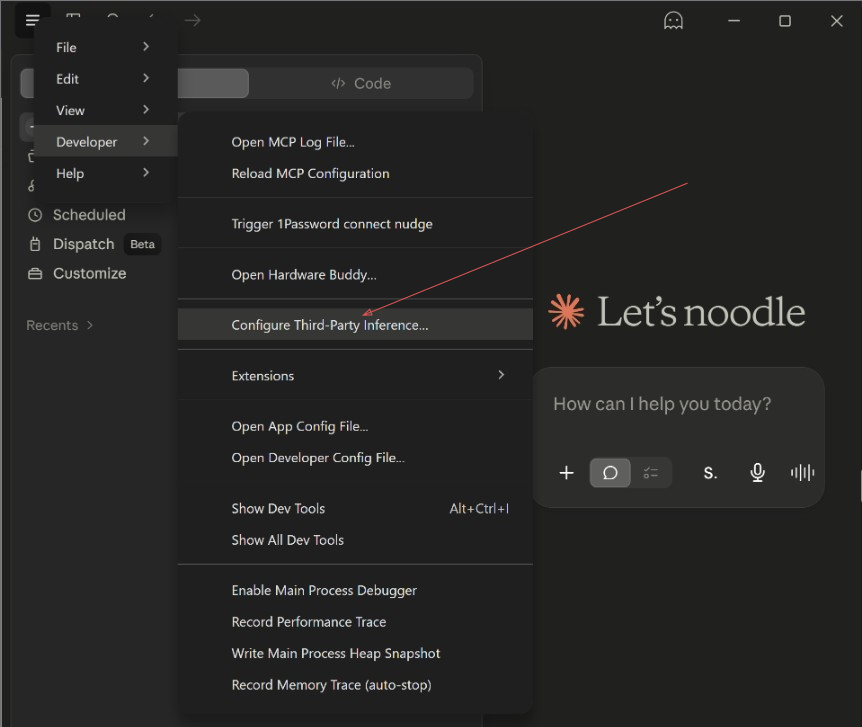
3. In Connection, select Gateway from the provider dropdown.
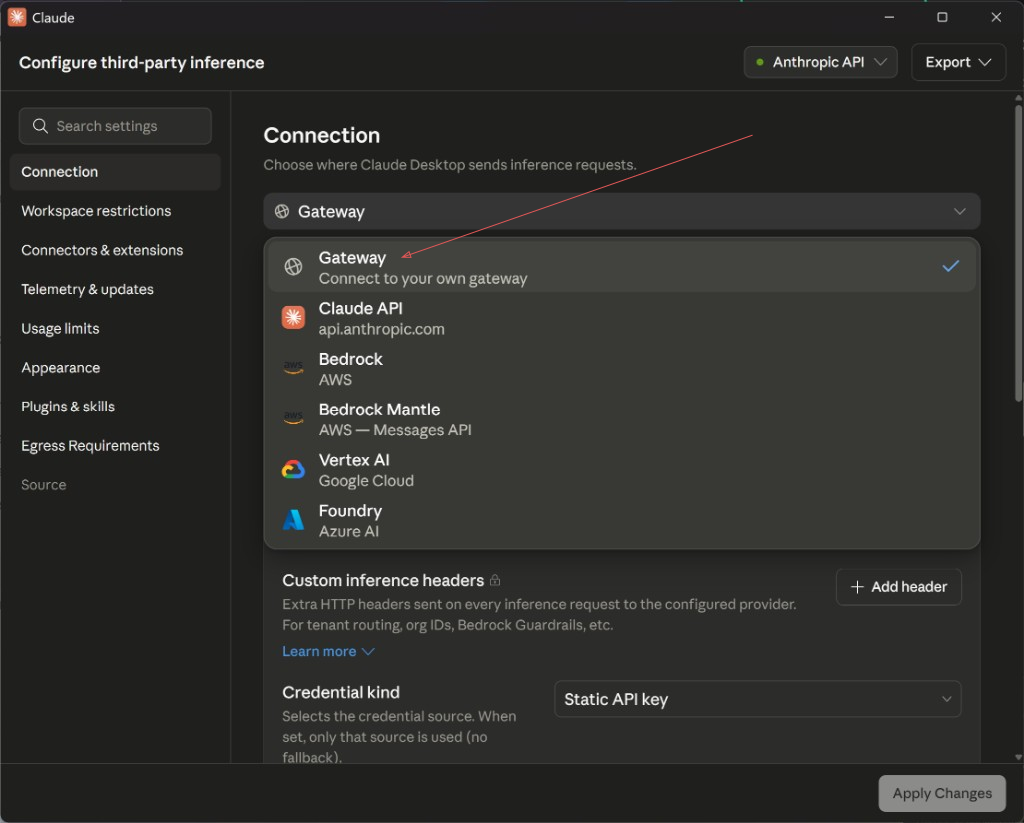
4. Enter the gateway connection values:
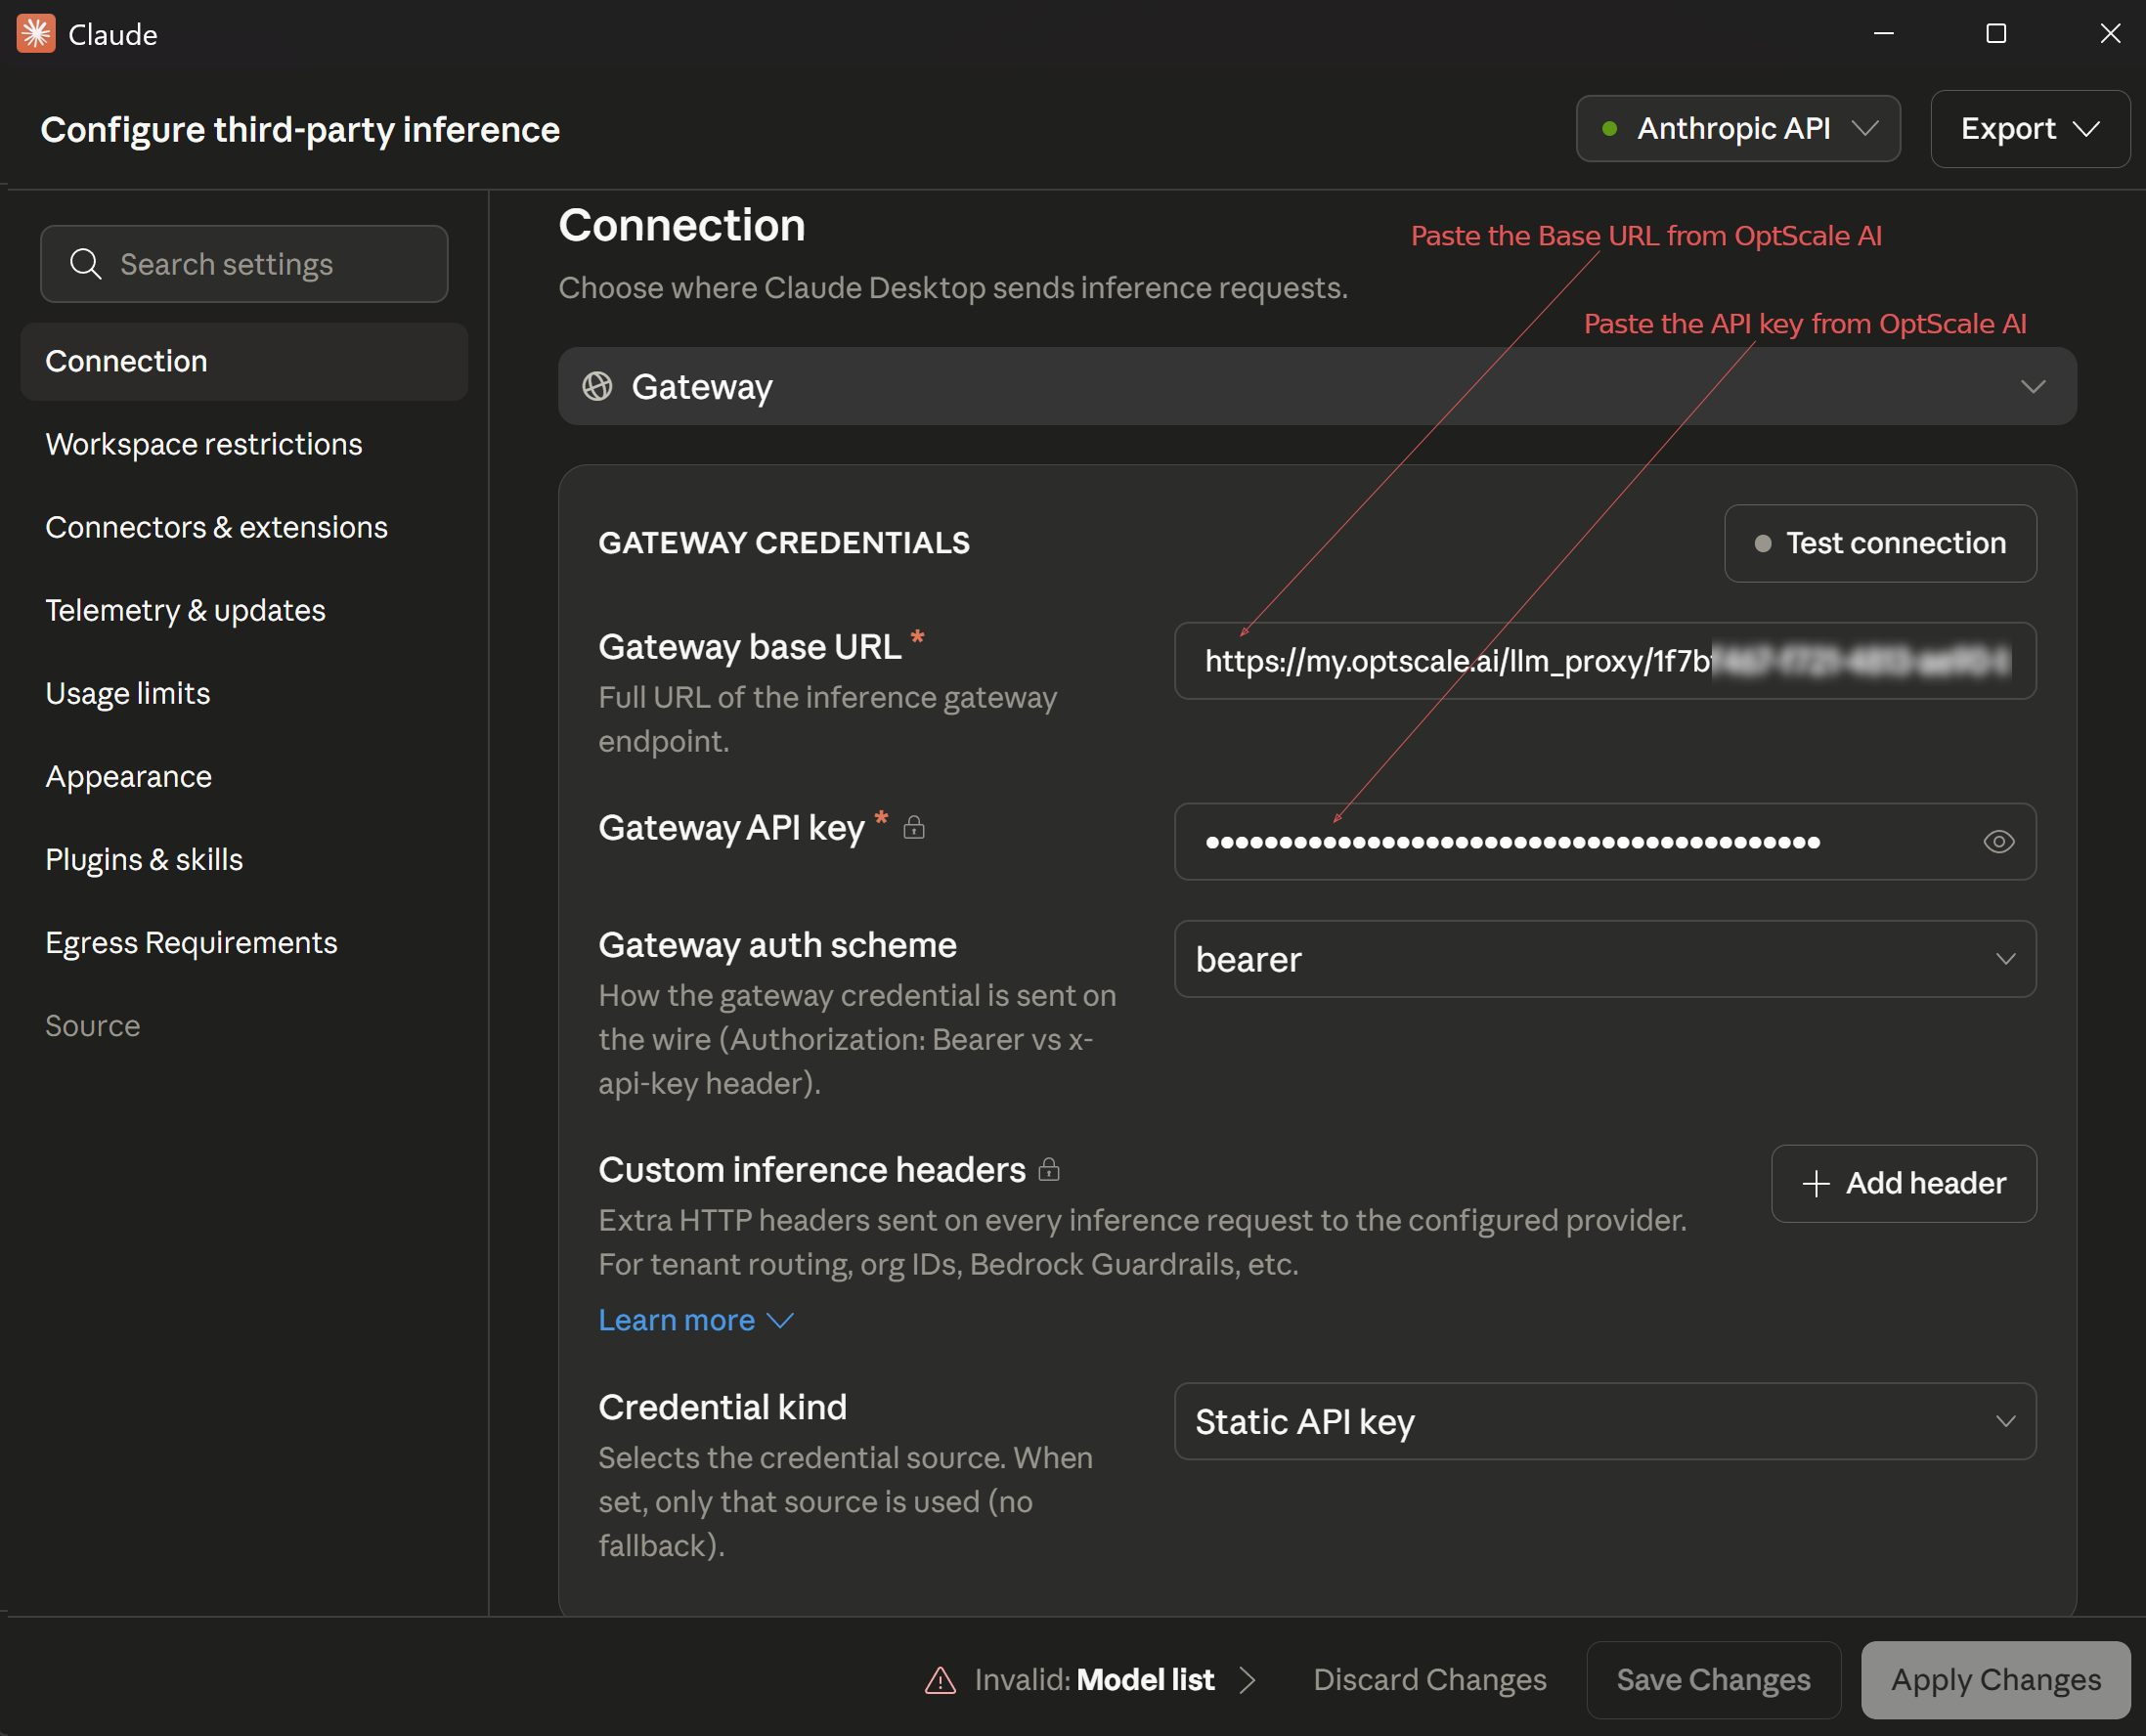
-
Gateway base URL — Copy Base URL from Connect this model to external tools → OPENAI-COMPATIBLE, replace
/v1with/anthropic, and paste the resulting value.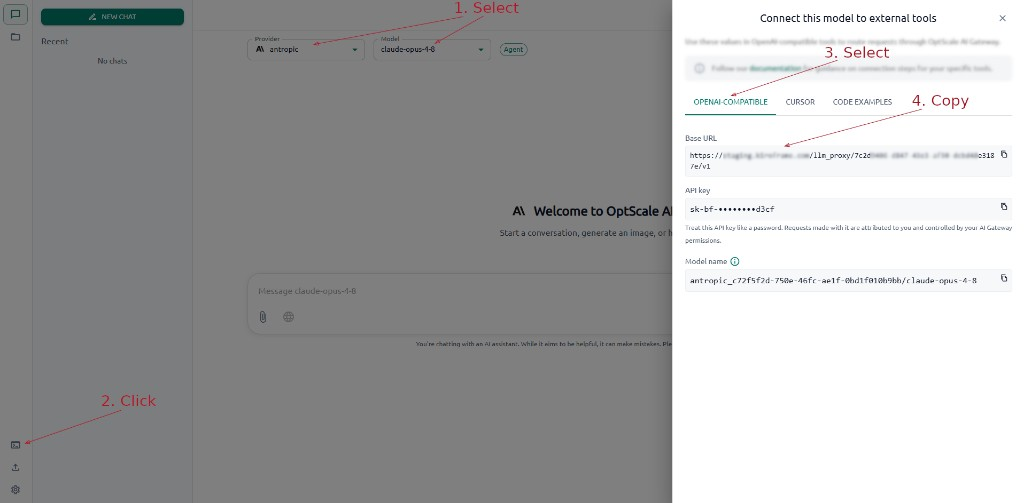
-
Gateway API key — Copy API key from the same Chat dialog and paste it into Gateway API key.
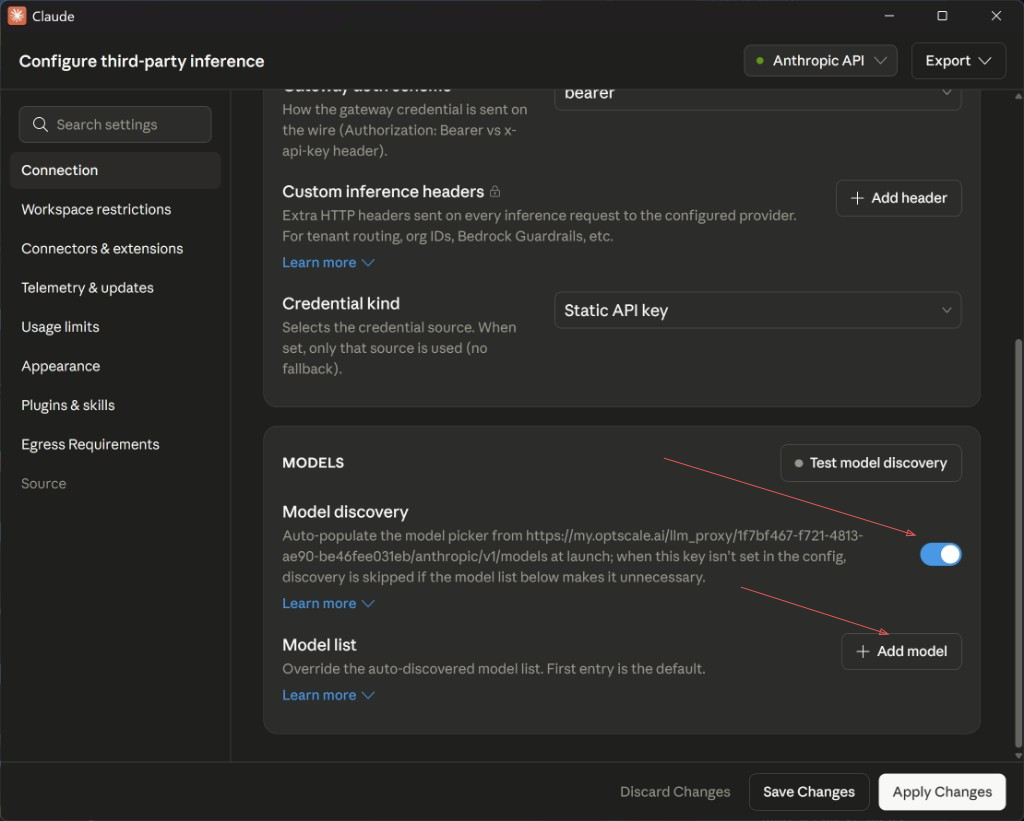
5. Configure models in Connection → Models:
-
Model discovery — Enable to populate the model picker automatically from the gateway.
-
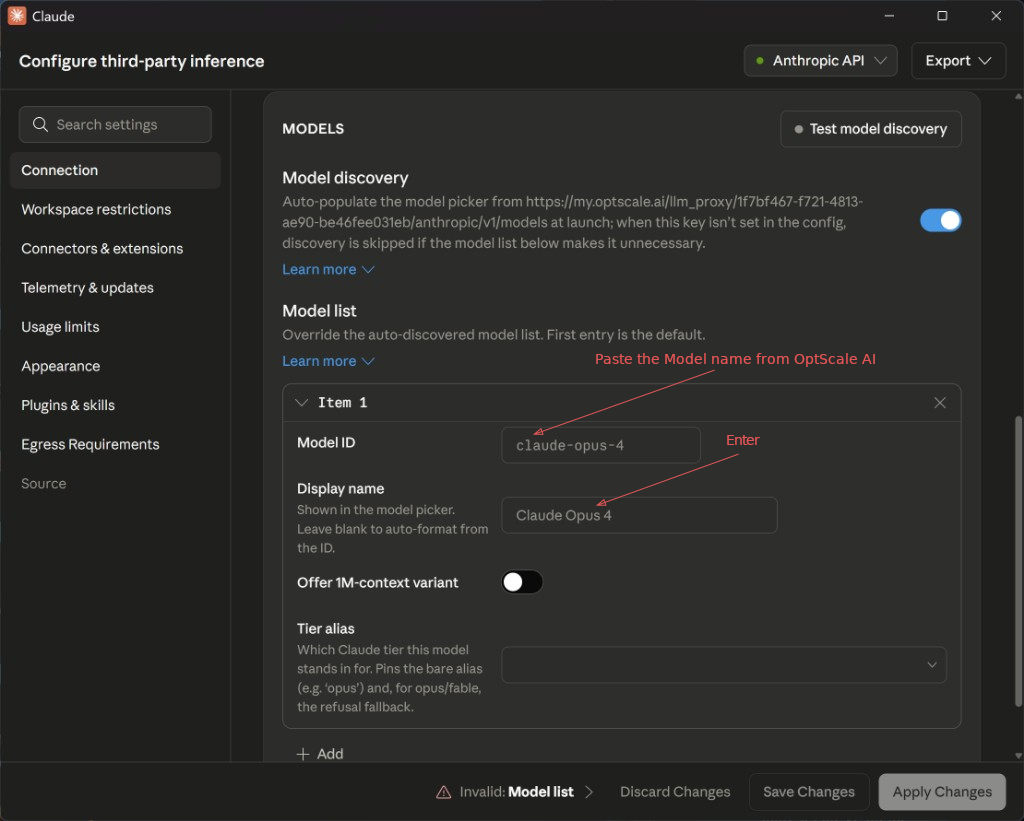
Model list — Add models manually by specifying Model ID and Display name.
-
Model ID — Copy Model name from OptScale AI Chat.
-
Display name — Enter a descriptive label for the model.
-
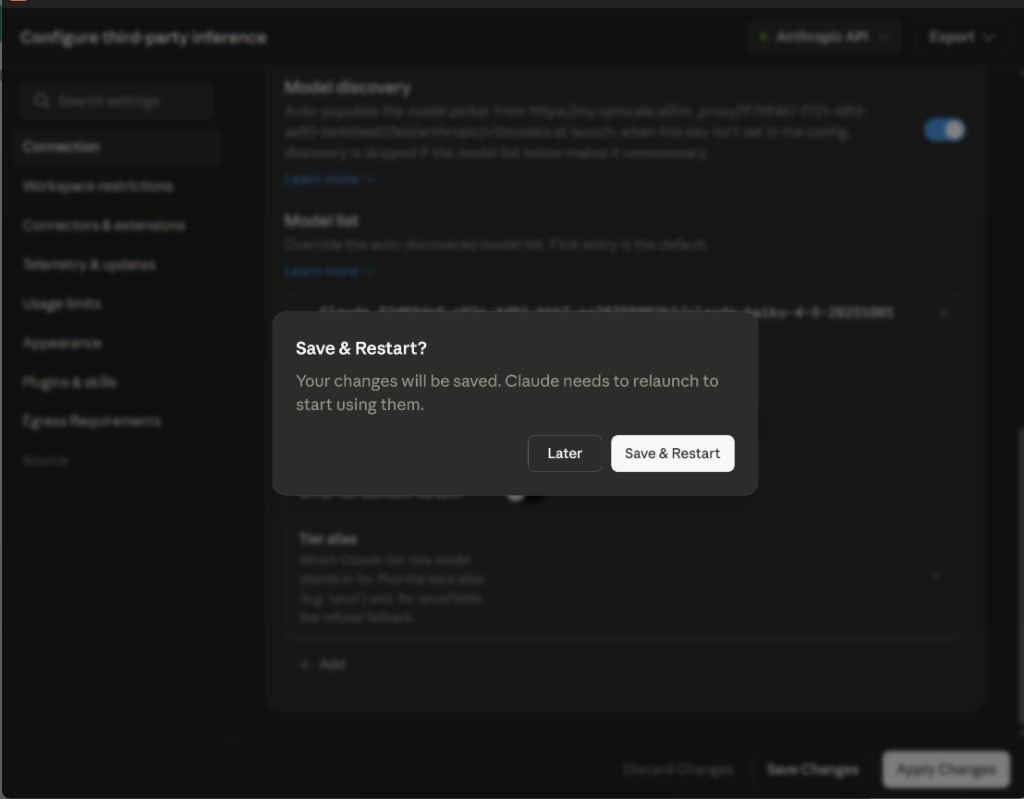
6. Click Apply Changes. When prompted, click Save & Restart to relaunch Claude Desktop with the new configuration.
7. Confirm that the gateway connection is active and the configured models appear in the model selector.
Verify the connection#
In Claude Code or Claude Desktop, send the following prompt:
Reply with exactly: OptScale AI connection works.
The expected response is:
OptScale AI connection works.
In the Admin Console, open Analytics → Traces and confirm that a row appears for the selected Provider and Model. Requester is the user for whom the connection was configured.
See also#
- Get connection values from Chat — Retrieve the Base URL, API key, and model name.
- External Tools — Review shared requirements and limitations.
- Connect Cursor — Connect Cursor to OptScale AI.
- Analytics → Traces — Verify requests after connecting.